


23
Jun
Bird Photography Tips: Flash Setup For Birds
- By Gaurav Mittal
- 3 Comments
I have often been asked about the flash setup I use for bird photography, this is a question that is often followed by remarks such as, “it seems cumbersome”, “what is the right setup?” “It seems like a lot of work to setup” and so on. The purpose of this quick post is to introduce you to the basic setup for flash photography on birds and show you the various photographic tools that are necessary to execute proper flash use. This post is not about how to use flash as I have written a beginners introduction on flash use on my blog. I assure you that by the end of the post you will know all the setup requirements and you will realize that it is neither time consuming to setup once you get to know your gear nor as cumbersome to carry. While giving Bird photography tips, I often talk about the importance of fill flash, being prepared with the right tools and setup will provide you with successful results consistently.
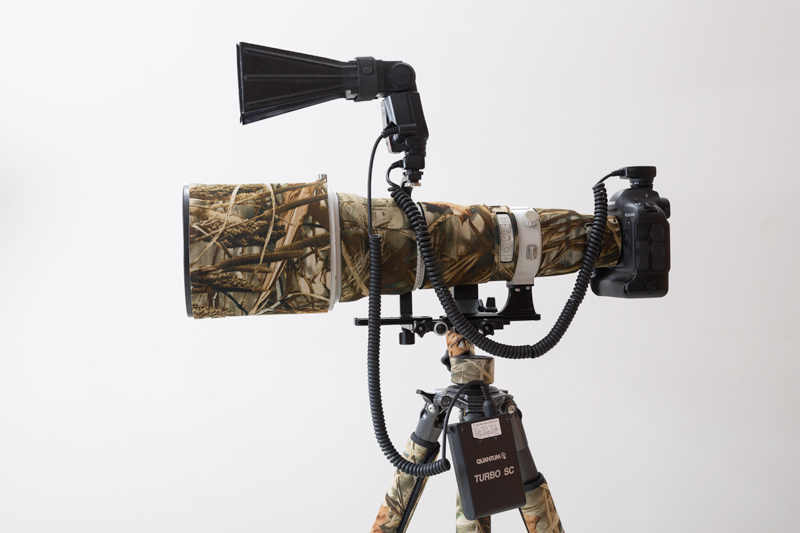
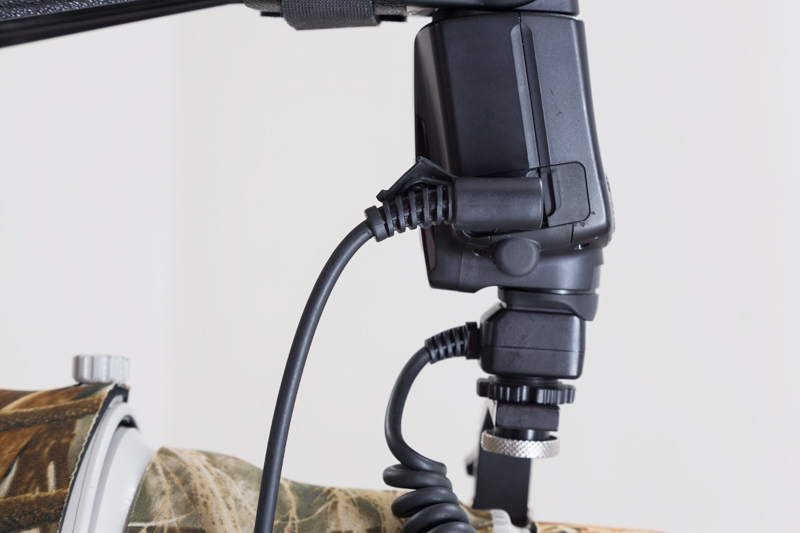
The above image shows how the basic flash setup appears once it is assembled and properly mounted on the lens and camera. The camera and lens are setup on a tripod and are reinforced tightly so they do not swing and move around as you install the flash and related accessories. While there are multiple ways to get setup, I prefer to have the camera and lens on the tripod before I mount the flash and other accessories. Following accessories are needed for the setup:
- Canon 580 EX II flash or similar
- Better beamer
- Vello TTL Off camera flash cord or similar
- Whimberley F-1 telephoto combo flash bracket
- Quantum Instruments battery pack or similar
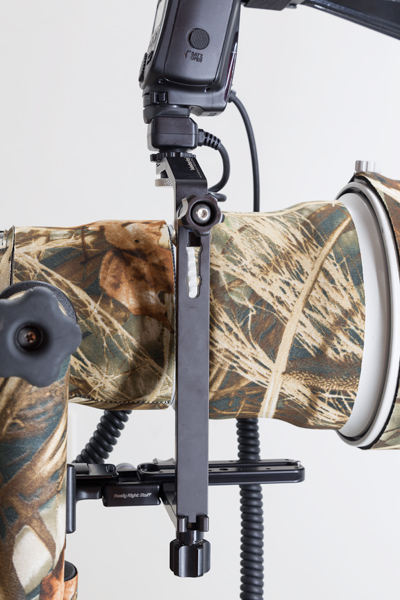
As seen in the first of the two images above, the Wimberley flash bracket is attached to the lens Arca Swiss type footplate and secured tightly. Then, one end of the cable is attached directly into the camera’s hot shoe and the other end is attached on top of the flash bracket with a built in flash shoe mount, this allows the flash to be placed off camera and on to the bracket while still being connected to the camera with the flash data accurately recorded.
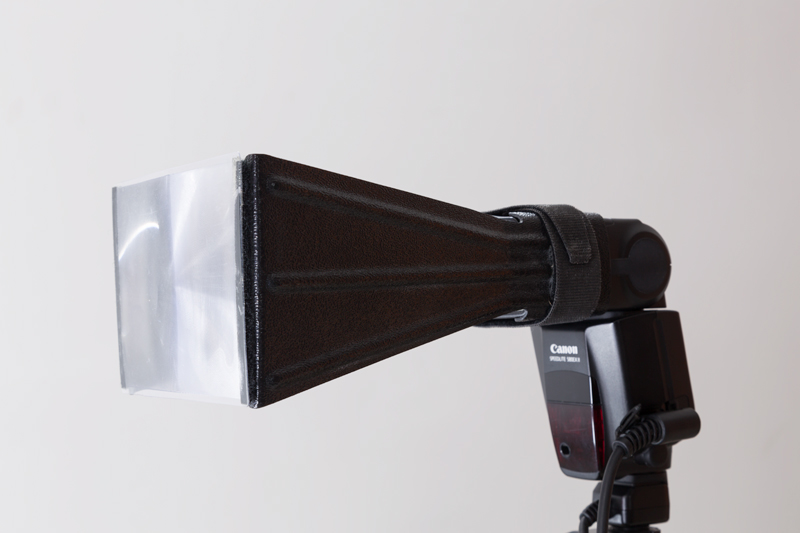
The next step is to install the Better beamer on the flash; this is quick and self-explanatory as seen in the image above. A Better beamer extends the range of your flash and is intended to be used on lenses with a focal length of 300mm or greater. It works well where long distance fill-flash is often required on birds and other wildlife. The better beamer consists of a fresnel panel, which is secured in front of the flash with the help of plastic side supports. This allows the flash output to be concentrated into a narrow beam, which reaches the subject accurately without lighting up an entire scene and giving a flat feel to the image. At this point you will secure the flash with the better beamer attached to it on the flash shoe mount of the Whimberley flash bracket.
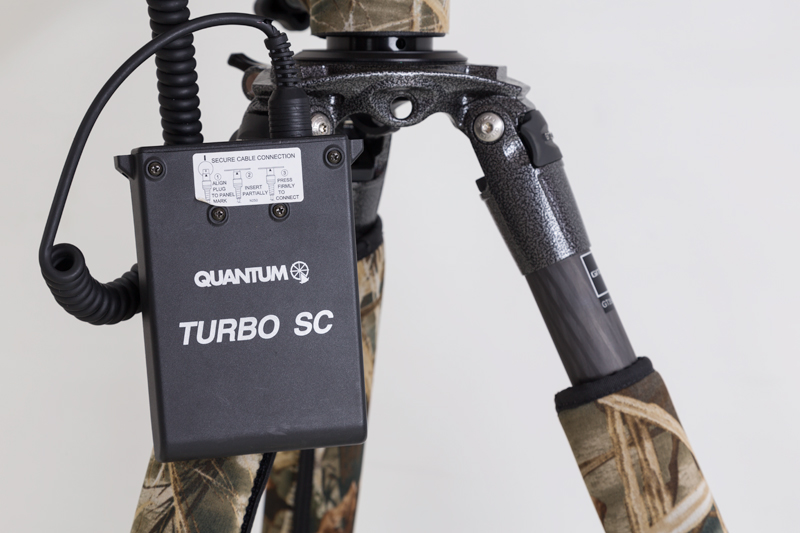
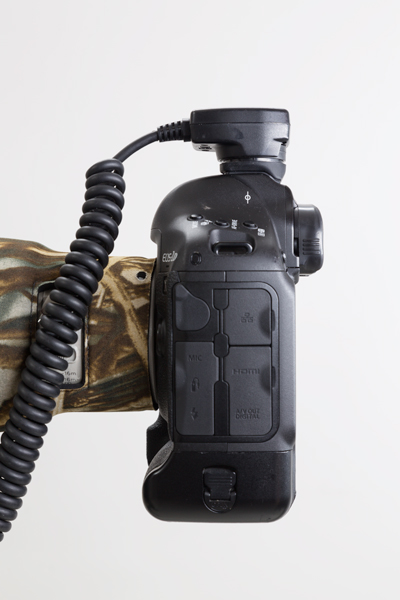
The last step is to connect a battery pack to the flash. A battery pack like the one above provides you the ability to shoot all day without worrying about battery discharge, also the recycle time is fast which provides you with consistent flash output. I have often shot for two day at a time without having to recharge the pack. As seen in the two images above one end of the cable is connected to the battery pack and the other to the flash. Please do note that you will still need the four AA batteries in your flash to provide power to the LCD display.
As I had mentioned in the beginning, the process of a flash setup is simple and fast. Once you have all the necessary accessories, I recommend that you read all the instructions that come along with them and get comfortable by doing the setup at home. If you have any further questions relating to the above mentioned equipment or additional accessories that can be used in the setup, please do not hesitate to contact me via email.
September 8, 2014
Hello,
I’m interested in using flash in my bird photography. Since I have a Nikon câmera and lens, my choise is easy in what concerns the flash: Nikon SB-910. My problem is how to attach the flash to my lens (a Nikon 500mm f/4), since I don’t use a tripod.
The photo that you published is not clear enough (at least for me). Can you specify if you use anything other than Whimberley F-1 telephoto combo flash bracket – and what – and if possible show some other pictures. Can you also sugest some other bracket – besides Whimberley F-1 – that is quite expensive.
Best regares and thanks
Alvaro Nunes
September 11, 2014
As I understand, you want to be able to keep the flash and the better beamer mounted to your lens when shooting handholding. There are two options with the Wimberley, the older F-1 and the combo 9 flash bracket, of these the F-1 allows you to keep the flash bracket attached to the lens via an Arca-Swiss type foot plate attached to the lens, this option works well if you like to keep the flash mounted at all times, you can take the camera of the tripod and the flash bracket remains attached to the lens. The combo 9 flash bracket system that is far versatile, attaches directly to the Arca-Swiss style dovetail on the swinging arm of the Wimberley Head Version II. This also is useful if you decide to switch lenses as it remains attached to the Wimberley head, the combo 9 also works with the Wimberley sidekick, further with the M-1 and M-2 attachments you can go handholding or shoot from your vehicle.
The other accessories that I use is the M-6 extension post, This module allows you to extend the height of your flash bracket up to another 5″ to further minimize possible red-eye in subjects.
I would recommend these flash brackets over any of the cheaper ones available in the market, yes these are costly but a lifetime investment.
I will shortly be updating and doing a new blog post with the new setups I’m using, including a replacement for the better beamer.
October 13, 2014
I followed your advice and bought the Wimberly f-1 bracket. It came last monday and I only had the oportunity to photograph using flash last friday. My first conclusion is that I have very much to learn about flash photography in general and, in particular, wildlife photography using flash. I have looked on internet for more information about flash photography and it doesn’t seems to exist much, in particular, related to how to use a flash. Anything that you write about this subject is very wellcome. Thanks for the help.
Submit a Comment