


09
Dec
7 Steps To Streamlining Your Bird Photography Workflow
- By Gaurav Mittal
- No Comments
In this article, I share with you in detail the seven steps I implement for a streamlined bird photography workflow. I discuss what is going on in my head when I’m getting ready to shoot, and in a comprehensive way walk you through a typical day in the field.
Step One: Know Your Vision Beforehand
Oftentimes, when you go out to do bird photography, there is stuff happening everywhere: birds flying, birds interacting, birds that are perched. Amateurs have the tendency – and I used to do the same thing – to say, “Look, there’s a beautiful bird!” and just start shooting at random because afraid that they’re going to miss the shot. But if you take that kind of approach, you’re not going to get the quality of the image you’re looking for. On most of my private tours and workshops, people get frustrated that they’re not going to get the hang of it. I completely relate to that.
The first step to getting beyond that frustration, which is also the first step in my bird photography workflow, is to know exactly the type of image you want to make while you’re on the shoot. I decide before I go out whether I’m looking to shoot birds in flight or bird portraits or silhouettes. Each of these genres of bird photography requires a completely different mindset. Once I’ve decided that I want to do – for instance, birds in action – I try to pre-visualize the type of interaction I want to see. You’ve probably heard it said that if you don’t know where you’re going, you’re not going to know how to get there. That holds true in bird photography, too. Unless you know what your destination is, you’re not going to be able to decide how to get there.
Taking this first step will dictate how you’re going to approach your subject and the mindset you’ll assume when you’re in the field.
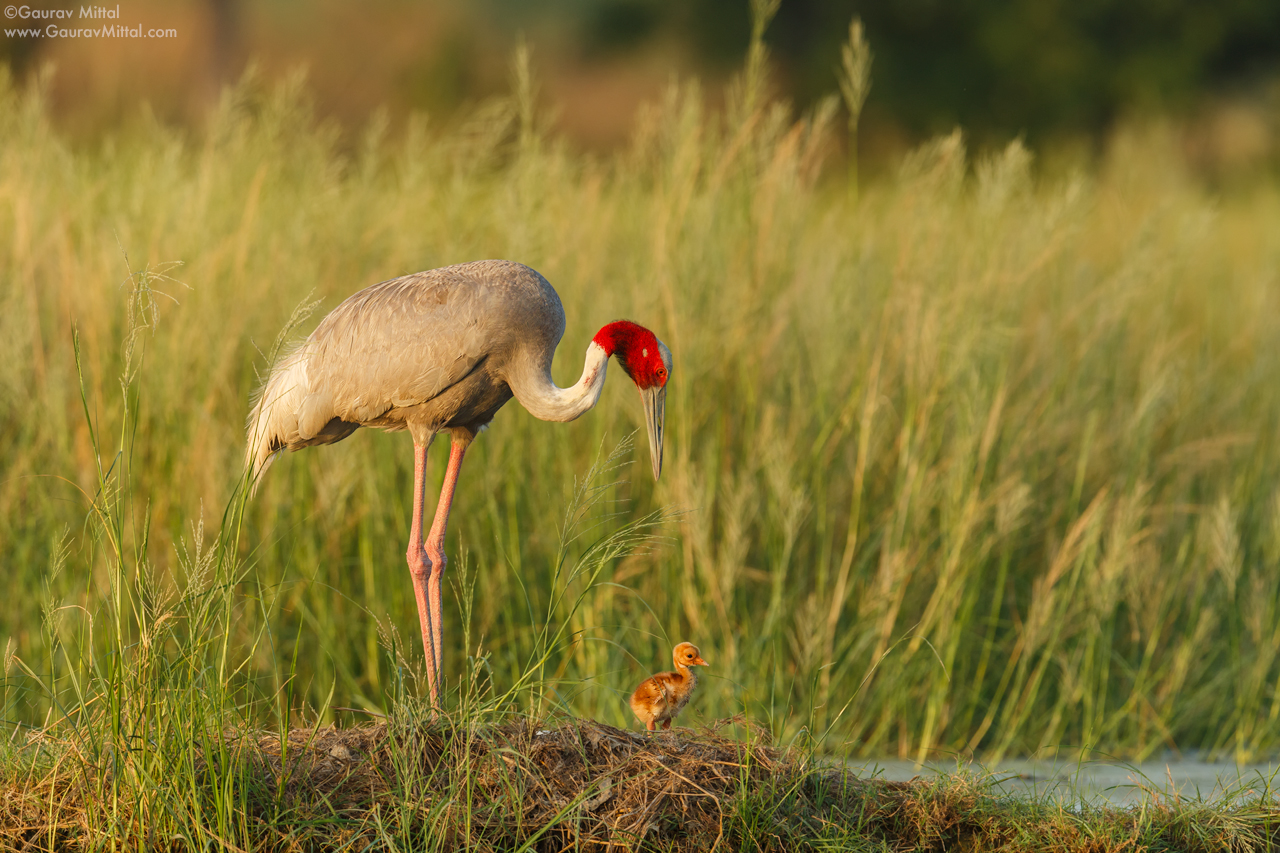
Canon 5D Mark III / 600mm 1.4X / 1/500 sec @ F/8.0 – Sarus Crane with chick
Step Two: Choose Your Gear Carefully
Once I know what type of bird photography I want to do, then I can decide what kind of gear I need. In bird photography, we use a lot of heavy equipment. 500mm and 600mm lenses are extremely heavy, and that’s even before you’ve mounted these lenses on your camera body and added filters, extenders and things like that. So the second step in my bird photography workflow is to think about what camera gear you actually need. Having the right equipment for the right kind of shoot allows you to optimize your images, and it greatly simplifies your time in the field.
When I was an amateur, I would end up bringing all kinds of gear to a shoot, just in case I wanted to do landscapes or birdscapes or some really close up shots. The thing is, carrying a lot of heavy equipment not only slowed me down, but it also made me really noisy in the field. That scares away birds and other wildlife, which is pretty counter-productive.
Furthermore, the more equipment you have when you’re out in the field, the more confused you become. I suggest carrying just a few lenses or one main lens because that forces you to think about what you actually want to shoot.
Step Three: Do Your Homework
Birds are very unpredictable, so I’m never in a rush to start shooting. I usually arrive at the park or wildlife area where I’ll be shooting at least a day or two ahead of time to survey the area. This gives me the ability to set my bird photography workflow based on what type of bird activity is happening, what the mood is like in the park, how the light is at certain times of day, etc.
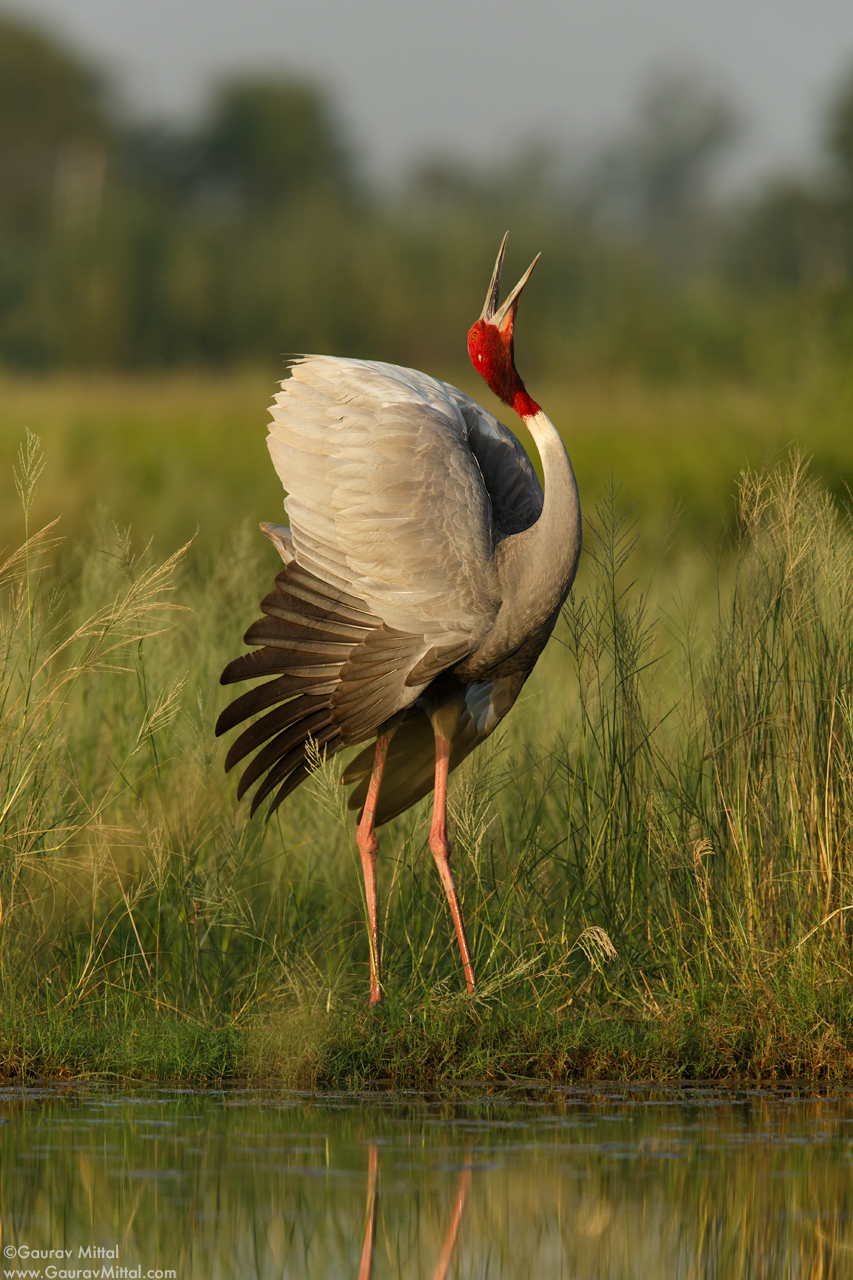
Canon 5D Mark III / 600mm 1.4X / 1/1600 sec @ F/8.0 – Sarus Crane calling
Whenever you go out to photograph a new bird, it’s imperative to do your homework first. Read up as much as you can about what it feeds on, what its behavior is like and where it dwells. All of these things will inform how you’re going to plan your shoot and will ultimately help you to streamline your workflow in the field.
In this day and age, you can get a lot of great information by searching the name of a bird or park on Google or Wikipedia. If you’re in North America, Sibley’s guide to birds is a wonderful catalog-like resource that explains the features and behaviors of birds as well as where to find them. A famous birding book in India is Birds of the Indian Subcontinent. There’s also a great app by the same name. If you’re in the U.S., iBirds lets you log what you’ve seen throughout the day and can help you if you’re having trouble identifying birds in the field.
Step Four: Optimize Your Time in the Field
When it comes to having the right kind of light, you really only have a short window to get the quality images you are looking for. On a typical day, I get up very early because birds are most active as the sun is coming up and late in the afternoon as it’s going down. Those are the times that they are feeding or preening or feeding their young ones. They like to stay in the shade when the sun is high up, so that is not the best time to shoot.
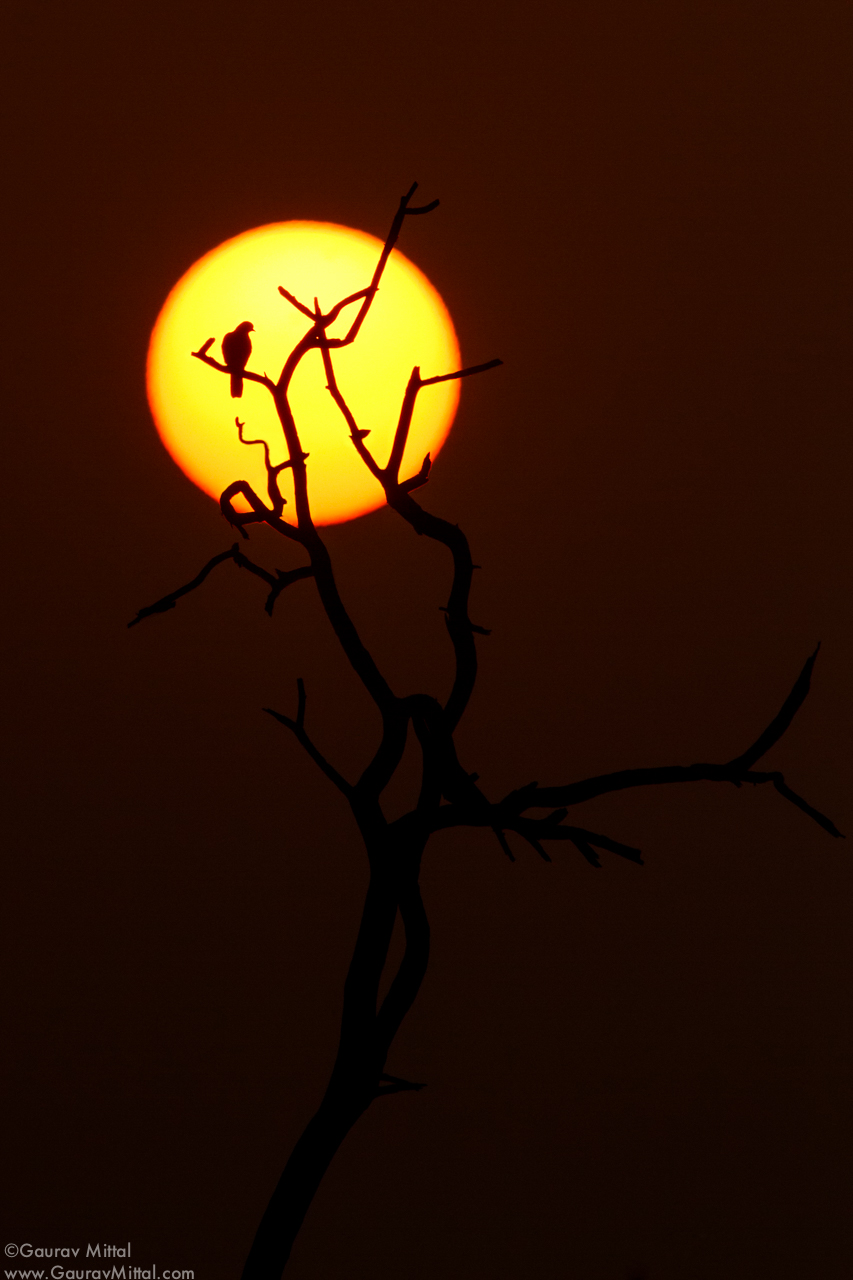
Canon 7D / 100-400mm / 1/4000 sec @ F/8.0 – Laughing Dove
So let’s say I’m doing silhouettes in the early morning, and I want the bird in the image to be right in front of the sun. I’ll get to the location that I researched a day or two beforehand and set myself up based on that goal. The key here is to stay focused on your vision instead of allowing your mind to be diverted somewhere else because you think some other action might be happening.
Step Five: Start Culling Your Images Right Away
I typically get done around 10:30 or 11 in the morning when the light starts to get harsh and the birds begin to dissipate. At that point, I’ll go back and download all the images I’ve taken that morning and decide which ones I’d like to keep and which ones need to be deleted. In bird photography, it’s very easy to shoot 1000 images in an hour, especially when you’re shooting birds in action or in flight. You start pressing the shutter as a bird goes by, and before you know it, you have a couple hundred or even a thousand images. So it’s really important that you download your images right away and start culling the ones you don’t need so that you don’t lose track of everything you have.
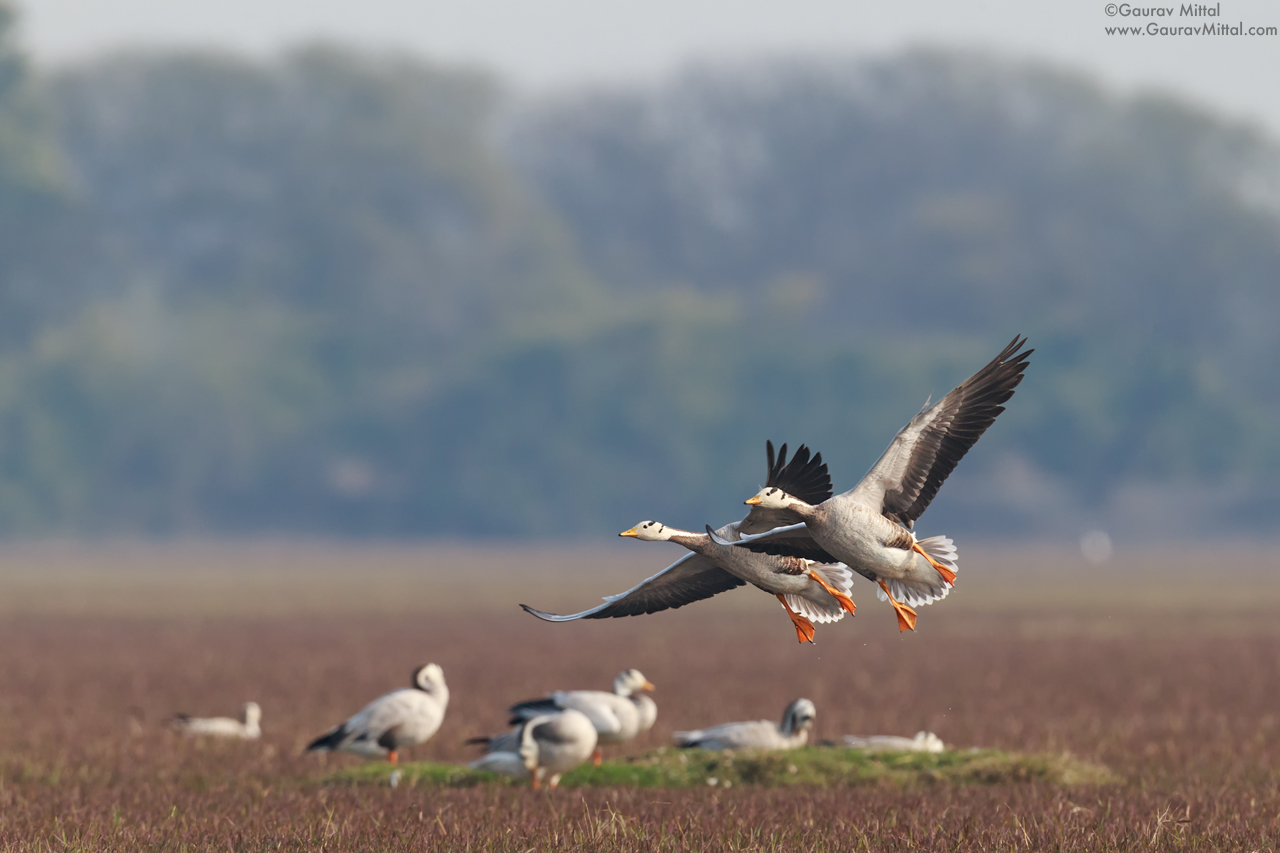
Canon 1DX / 600mm 1.4X / 1/1600 sec @ F/8.0 – Bar-headed Geese
Step Six: Have Patience
The key with bird photography is that there is one word and one word only: patience. The patience aspect is what makes a really good bird photographer, and it’s also where a lot of newcomers lose out. I remember there were so many days at the beginning where I just wanted to quit. Because I would spend eight hours a day waiting for a bird to appear or trying to crawl up to a bird that was there, only to come away without anything to show for it.
One of my all-time favorite shots is proof that the best things are worth the wait. Here, you’re looking at a Grey-headed Canary Flycatcher. It’s a very small very shy bird that always hides in bushes and never comes out into the open. This was my target bird for the entire two days that I was at a certain park. I knew that it was a difficult bird to capture, so I would need to allocate a lot of time to it. You can’t always just rush in and hope to get one shot and be done with it.
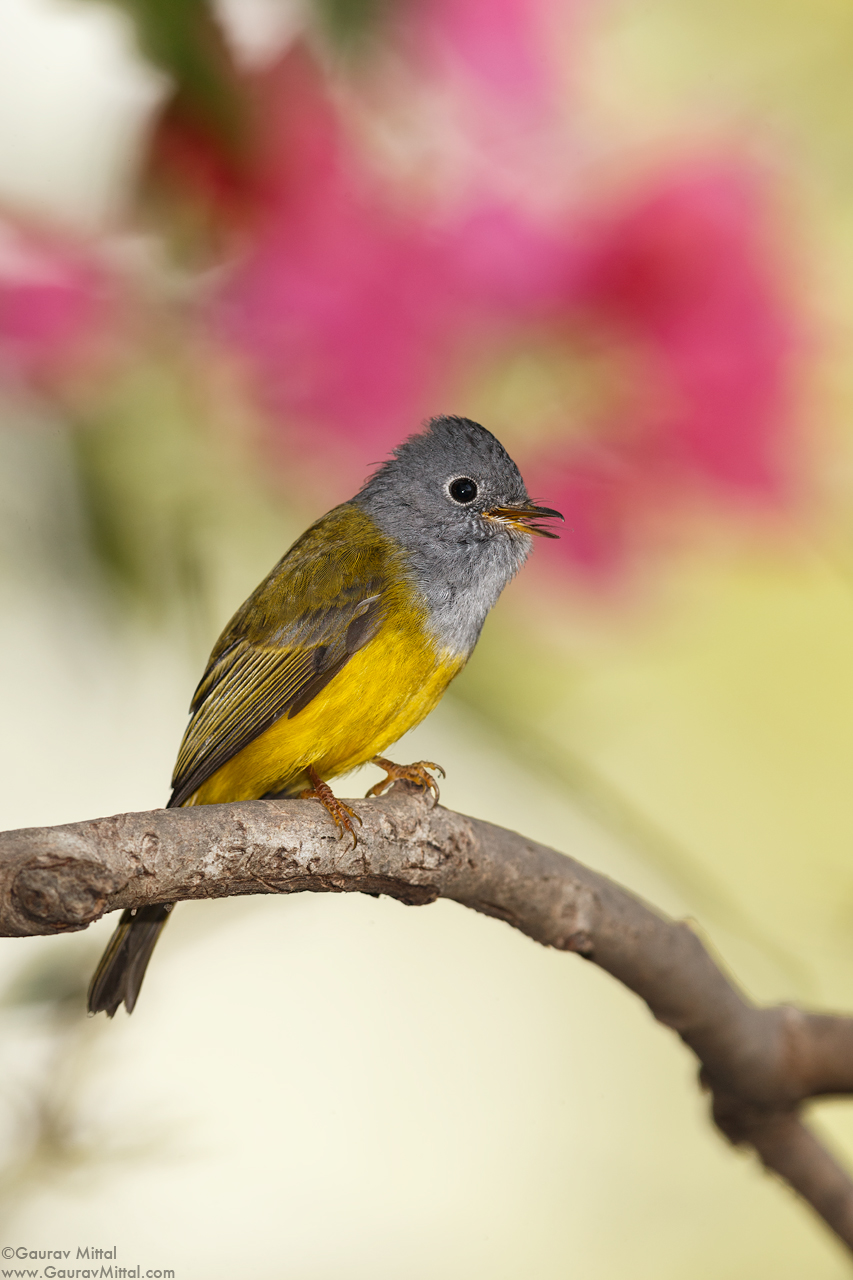
Canon 1DX / 600mm 1.4X / 1/200 sec @ F/8.0 /Grey-headed Canary Flycatcher
On the first day, I spent about four hours just hiding behind a bush with binoculars, observing how the bird behaved, when and where it came out and what its patterns were. I had pretty much everything going against me. In the area the bird chose, there was no chance of light ever coming through because the whole area was covered by trees. So I jotted down a few notes about how it hopped around on certain perches and what equipment I would need to capture it. In this case, that meant that beyond using the right lens as well as my Canon 70D Mark II, which is a crop sensor camera, I knew I would need a flash in order to light up the bird.
The next day, I spent the first two hours very slowly setting myself where I knew I would be able to get some clean portraits of this pretty bird and be close enough that it could be lit up properly by the flash. After I identified the right location, I paid close attention to my background. I was lucky on this particular day that there was a bougainvillea flower creating a beautiful artistic pattern of pink and little textures of greens and off-whites behind the perch.
From then on, I stood in the same spot for eight straight hours. I literally call this shot “Wait for Eight” because I did not move except to take a sip of water. For me, this image was a labor of love. Once you keep a certain distance from a bird and don’t move, they don’t perceive you as a threat anymore and slowly start coming out into the open. And that’s exactly what happened. In the eighth hour, the flycatcher came out and sat on the perch for about ten seconds. When I had the focus right, I just pressed the button and let the camera sing. I probably got twenty shots, but this one – with the bird looking so lively in front of just the kind of background I wanted – is the one I’m really happy to have.
After being so desperate in the eighth hour, the only thing I can say is that when I got the shot, I got down on my knees and broke down. I’ve learned that moments like these are what mentally makes you or breaks you as a photographer. I could have easily come away after eight hours without the bird ever coming out. Would I go back tomorrow and do the same thing all over again? Yes. Absolutely. You have to know your subject and what it requires. I could have shot an easier bird, but you have to create challenges for yourself if you want to step up your game as a bird photographer.
Step Seven: Be Ready for the Unknown
Sometimes getting the perfect shot requires days of preparation. Other times, it’s as simple as turning around and pressing the shutter. In one such instance, I was waiting to do some backlit images of birds. I was there for three hours, and the action just wasn’t happening. The light was getting really nice as it sank lower in the sky, and I turned around and saw these scarlet dragonflies surrounded by surreal light that was bringing out beautiful glowing yellows and oranges. The composition and colors worked so well that I literally turned around and took the shot.
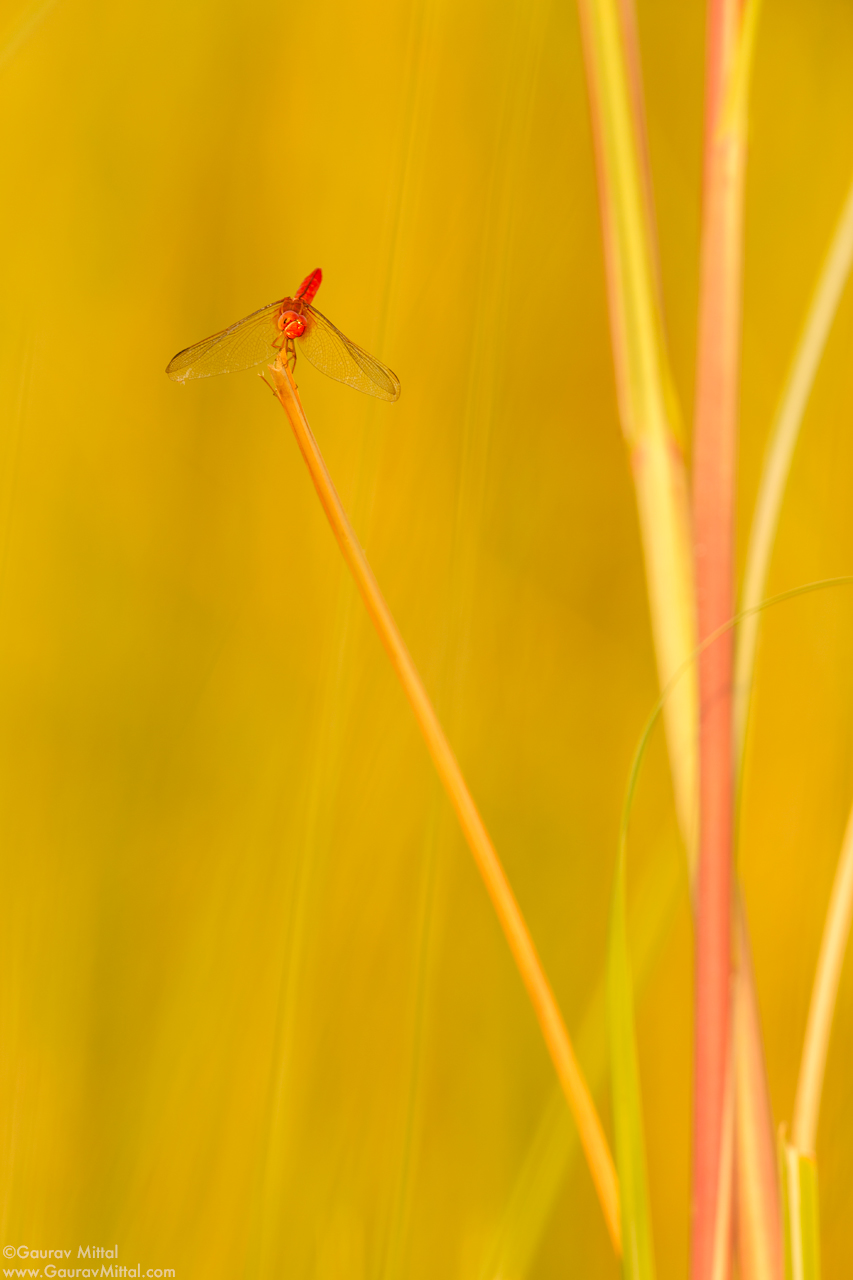
Canon 5D Mark III / 600mm 1.4X / 1/80 sec @ F/8.0 – Scarlet Dragonfly
That unknown is what excites me every time I go out to shoot. I know from experience that there is always the possibility that a beautiful moment in nature might appear just when I least expect it. Sometimes what’s happening behind you is just as important as what’s happening in front of you. So an important way to utilize your time in the field is to always keep your eye on your main subject but to never stop looking for opportunities all around you. A long lens brings the world close to me, and as I’m tracking things with my lens, sometimes I’ll happen upon something that hits a nice note. Yes, I’m a diehard bird photographer, but I’m always looking to come away with something unique.
Conclusion
These seven steps will help you to streamline your bird photography workflow and to make the best use of your time in the field. Remember, how you start out dictates what your end result is going to be. For the best results:
- Have a blueprint. You’ll come away with much higher quality images when you actually put a plan in place.
- Only bring the gear needed to actualize your vision. You’ll be much more focused in the field – and as an added bonus, you’ll be less bogged down and a lot quieter, too.
- As a principle of bird photography, always do your homework beforehand. Spending time observing your subject and taking notes is never a waste.
- Once you’re familiar with the behavior of your target birds, you’ll be able to optimize your time in the field by shooting when they’re most active.
- Take advantage of midday downtime to download your images and decide which ones you want to keep so you don’t lose track of what you have.
- Most importantly, have patience and be ready for unexpected moments of beauty. The results, no matter how long the wait, are always worth it.
Submit a Comment